Setup a Testnet Wallet and Receive Funds from the Faucet
In this tutorial, you will create a new mnemonic seed phrase to set up a Stronghold account with the NodeJS binding of wallet.rs. Afterward, you will generate a new address, request funds from the Shimmer testnet faucet, and check your account balance.
Prerequisites
Development Environment and Libraries
Set Up
Prepare Your Development Environment
- Create a new folder for the tutorial in a location of your choice and navigate to it:
mkdir wallet-setup
cd wallet-setup
- Run the Node.js initializer to configure the project:
npm init --yes
- Overwrite the
package.jsonfile with the following content:
{
  "name": "wallet-setup",
  "version": "1.0.0",
  "description": "",
  "main": "create-mnemonic.js",
  "dependencies": {
    "@iota/wallet": "2.0.3-rc.1",
    "bip39": "3.0.4",
    "dotenv": "16.0.1",
    "node-fetch": "2.6.7"
  },
  "scripts": {
    "test": "echo \"Error: no test specified\" && exit 1"
  },
  "author": "",
  "license": "Apache-2.0"
}
- Install new dependencies by running the following command:
The installation might take a while if there is no prebuilt wallet NPM package for your combination of OS and NodeJS version.
npm install
Prepare the Network Configuration
Create a new file networkConfig.js and add the following code:
module.exports = {
  // Shimmer Beta network configuration
  node = 'https://api.testnet.shimmer.network';
  faucetWebsite = 'https://faucet.testnet.shimmer.network';
  faucetApi = 'https://faucet.testnet.shimmer.network/api/enqueue';
  explorer = 'https://explorer.shimmer.network/testnet';
};
Prepare the Environment Variables
Create a new .env file and add the content below:
In the .env file you don't need to end lines with comas or semicolons and you also don't need to enclose variables with quotation marks. Just make sure to use a new line for every variable.
ACCOUNT_NAME = '<Enter_your_name_here>';
SH_PASSWORD = '<Enter_your_password_here>';
MNEMONIC =
  '<You_will_create_your_own_mnemonic_seed_phrase_in_the_next_step_and_paste_it_in_here>';
Enter your desired account name as well as a secure Stronghold password. You will create your new mnemonic seed phrase in the next step and paste it here afterward.
Scripts
Create Mnemonic Script
Create a new file called create-mnemonic.js, and add the following code:
// Libraries
const bip39 = require('bip39');

// For better readability, some console output will be printed in a different color
const consoleColor = '\x1b[36m%s\x1b[0m';

async function run() {
  // A 256-bits entropy leads to a 24 word mnemonic seed phrase
  const mnemonic = bip39.generateMnemonic(256);
  console.log(
    consoleColor,
    'Copy your mnemonic seed phrase and paste it into the .env file:',
  );
  console.log(mnemonic, '\n');
}

run();
Run the script create-mnemonic.js and check the console output for your new mnemonic seed phrase:
node create-mnemonic.js
You can now copy the seed phrase and paste it into the previously created .env file.
Setup Account Script
Create a new file called setup-account.js and add the following code:
We broke the code into separate snippets to help you understand it better. To make it work, copy all code snippets one after another into the file you have just created.
1. Imports and parameters
This part imports all necessary packages, network configuration parameters, and environment variables.
// Libraries
const { AccountManager, CoinType } = require('@iota/wallet');

// Network configuration
const networkConfig = require('./networkConfig.js');
const nodeURL = networkConfig.node;

// Environment variables
require('dotenv').config();
const password = process.env.SH_PASSWORD;
const mnemonic = process.env.MNEMONIC;
const accountName = process.env.ACCOUNT_NAME;

// For better readability, some console output will be printed in a different color
const consoleColor = '\x1b[36m%s\x1b[0m';
2. Create an account
This part of the code will:
- Create a new account manager with defined options
- Store your mnemonic seed phrase.
async function run() {
  try {
    // Define the account manager options with the imported network configuration and environment variables
    const accountManagerOptions = {
      storagePath: `./${accountName}-database`,
      clientOptions: {
        nodes: [nodeURL],
        localPow: true,},
      coinType: CoinType.Shimmer,
      secretManager: {
        Stronghold: {
          snapshotPath: `./wallet.stronghold`,
          password: `${password}`,
        },
      },
    };

    // Create a new account manager
    const manager = new AccountManager(accountManagerOptions);

    // Store your mnemonic seed phrase in Stronghold
    await manager.storeMnemonic(mnemonic);

    // Create a new account with your set account name
    const account = await manager.createAccount({
    alias: accountName,
    });
    console.log(consoleColor, `${accountName}'s account:`);
    console.log(account, '\n');
3. Return account address
Every newly created Stronghold account has one address to receive funds at. This part of the function gets the address from the account and logs it out on your console.
    // Right after account creation, there should only be one address returned at keyIndex = 0
    await account.sync();
    const address = await account.addresses();

    console.log(consoleColor, `${accountName}'s Address:`);
    console.log(address, '\n');

  } catch (error) {
    console.log('Error: ', error);
  }
  process.exit(0);
}

run();
Run the script
Run the script setup-account.js and check the console output:
node setup-account.js
Stronghold will create a new wallet database folder, <accountName>-database, and a snapshot file called wallet.stronghold, which safely stores your mnemonic seed phrase.
The console output should look similar to this:
<account_name>'s Account:
Account {
  meta: {
    index: 0,
    coinType: 4219,
    alias: '<account_name>',
    publicAddresses: [ [Object] ],
    internalAddresses: [],
    addressesWithUnspentOutputs: [],
    outputs: {},
    lockedOutputs: [],
    unspentOutputs: {},
    transactions: {},
    pendingTransactions: [],
    incomingTransactions: {}
  },
  messageHandler: MessageHandler { messageHandler: [External: 277668a8e40] }
}

<account_name>'s Address:
[
  {
    address: 'rms1qqrmnqwysw6y7n0lhyju39p68fwwdv3a4m3khh0paczh2wft2wy853pmqmz',
    keyIndex: 0,
    internal: false,
    used: false
  }
]
You can see your new account and its associated address, which you will use to receive funds from the faucet. Before you request funds, let's check your account balance.
Check Balance Script
Create a new file called check-balance.js and add the following code:
We broke the code into separate snippets to help you understand it better. To make it work, copy all code snippets one after another into the file you have just created.
1. Imports and parameters
This part imports all necessary packages, network configuration parameters and environment variables.
// Libraries
const { AccountManager } = require('@iota/wallet');

// Environment variables
require('dotenv').config();
const password = process.env.SH_PASSWORD;
const accountName = process.env.ACCOUNT_NAME;

// For better readability, some console output will be printed in a different color
const consoleColor = '\x1b[36m%s\x1b[0m';
2. Import Stronghold account
The following part of the script will create a new account manager from the previously created Stronghold database path.
async function run() {
  try {
    // Create a new account manager from existing database path
    const manager = new AccountManager({
      storagePath: `./${accountName}-database`,
    });

    // Pass password to manager
    await manager.setStrongholdPassword(password);

    // Get specific account from account manager
    const account = await manager.getAccount(accountName);
3. Return account address(es) and balance
This script will synchronize your account and fetch its address(es) and balance.
    // Always sync before getting the account balance
    await account.sync();
    const balance = await account.getBalance();
    const addresses = await account.addresses();

    console.log(consoleColor, `${accountName}'s Address(es):`);
    console.log(addresses, '\n');

    console.log(consoleColor, `${accountName}'s Total Balance:`);
    console.log(balance, '\n');

  } catch (error) {
      console.log('Error: ', error);
  }
  process.exit(0);
};

run();
Run the script
You can now run the check-balance.js script and check the console output:
node check-balance.js
If you created a new mnemonic seed phrase at the beginning of this tutorial, you should see exactly one address and an entirely empty balance on your account.
<Account Name>'s Address(es):
[
  {
    address: 'rms1qqrmnqwysw6y7n0lhyju39p68fwwdv3a4m3khh0paczh2wft2wy853pmqmz',
    keyIndex: 0,
    internal: false,
    used: false
  }
]

<Account Name>'s Total Balance:
{
  baseCoin: { total: '0', available: '0' },
  requiredStorageDeposit: '0',
  nativeTokens: [],
  nfts: [],
  aliases: [],
  foundries: [],
  potentiallyLockedOutputs: {}
}
Request Tokens from the Faucet
Below you can find two ways to request funds from the Shimmer testnet faucet. You can either request funds via the Shimmer faucet website or programmatically by directly calling the API of the faucet.
Request Tokens via the Faucet Website
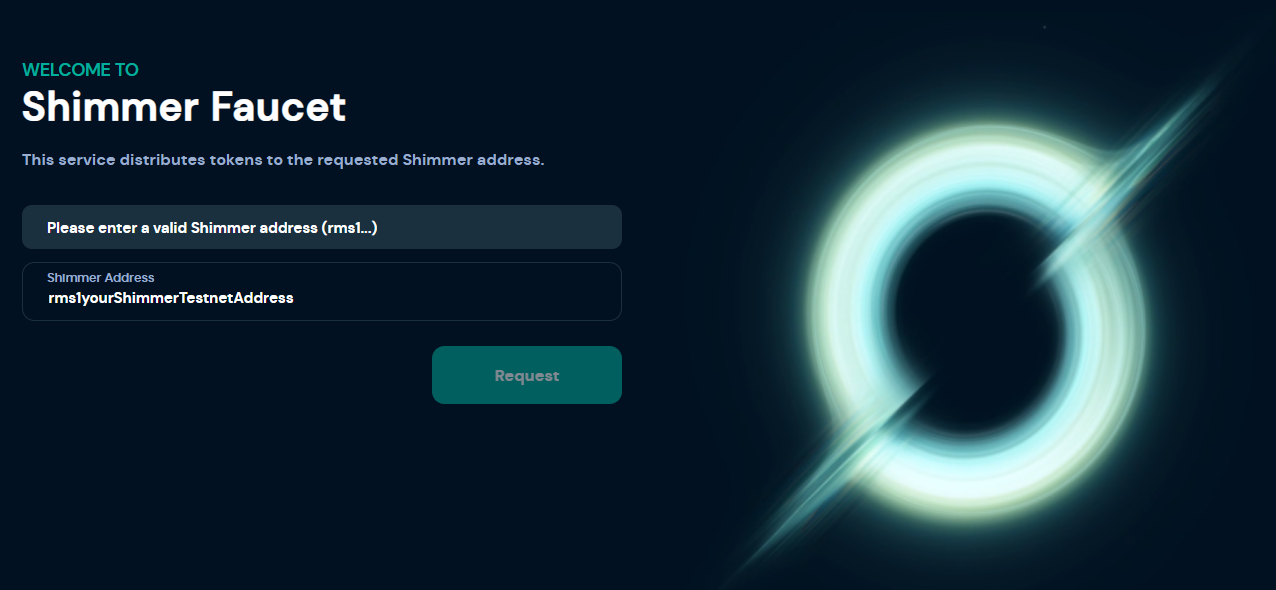
After you have set up your account, you can go to the Shimmer Testnet Faucet Website, paste in your newly created address, and request funds.
The 'Request' button will become clickable as soon as a valid Shimmer address is recognized.
Request Tokens via the Faucet API
Create a new file called request-faucet.js, add the code below, and replace the receivingAddress variable.
Make sure to paste your previously generated address into the variable receivingAddress. The function requestFunds receives the URL of the faucet API and a valid Shimmer testnet address and sends a request to the faucet API for tokens.
// Libraries
const fetch = require('node-fetch');

// Network configuration
const { networkConfig } = require('./networkConfig.js');
const faucetApi = networkConfig.faucetApi;

// For better readability, some console output will be printed in a different color
const consoleColor = '\x1b[36m%s\x1b[0m';

// Address to receive faucet tokens
const receivingAddress = '<paste_your_address_here>';

async function run() {
  const request = await requestFunds(faucetApi, receivingAddress);

  console.log(consoleColor, `Funds were requested from faucet:`);
  console.log(request, '\n');
}

// Request tokens from faucet via API call
async function requestFunds(faucetUrl, addressBech32) {
  const requestFunds = await fetch(faucetUrl, {
    method: 'POST',
    headers: {
      Accept: 'application/json',
      'Content-Type': 'application/json',
    },
    body: JSON.stringify({ address: addressBech32 }),
  });

  return await requestFunds.json();
}

run();
Run the script
Run the script request-faucet.js and check the console output:
node request-faucet.js
If the request was successfull, the console output should look similar to this:
Funds were requested from faucet:
{
  "address": "<your_address>",
  "waitingRequests": 1
}
Check Your Account Balance Again
After a few seconds you can check your balance again by running the check-balance.js script:
node check-balance.js
If the faucet successfully transferred testnet tokens to your address, your balance should look similar to the content below. If the total balance for the baseCoin is still 0, repeat the process of running the check-balance.js script since it might take a little time for the funds to be transferred.
<Account Name>'s Address(es):
[
  {
    address: 'rms1qqrmnqwysw6y7n0lhyju39p68fwwdv3a4m3khh0paczh2wft2wy853pmqmz',
    keyIndex: 0,
    internal: false,
    used: false
  }
]

<Account Name>'s Total Balance:
{
  baseCoin: { total: '1000000000', available: '1000000000' },
  requiredStorageDeposit: '42600',
  nativeTokens: [],
  nfts: [],
  aliases: [],
  foundries: [],
  potentiallyLockedOutputs: {}
}
Congratulations, your account is now ready to explore other exciting features of the Shimmer network, such as native tokens and NFTs on L1.